 |
The Georgia Mineral Society, Inc. 4138 Steve Reynolds Boulevard Norcross, GA 30093-3059 |
MAKING A BABULSKI-STYLE MICROMOUNT
by
Dave Babulski, Ed.D.
("Tips and Trips", Volume XXXV/Three, March 2006, Pages 9-11)

Greetings everyone, I have a special Micromount Corner for you this month. I will describe how I create my special Babulski-Style mineral micromounts. Unlike conventional practice I do not mount in the “box” but rather in the “lid” of the box. I use the black base type slip fit micromount boxes. Now you may ask, just why go against the conventional wisdom and mount in the lid of the box? The answer to that question deals with the home brew gimbal microscope mechanical stage I invented. I have always thought it a shame that much of a mineral micromount specimen was not available for viewing because much of it was hidden by the sides of the box. By mounting in the lid of the box and then using the gimbal mechanical stage, I can view the specimen through 270 degrees of rotation. Thus allowing examination of areas of a specimen that would otherwise remain hidden by the conventional "In the box" type mount. For our example, I will show mounting of a Spessartine garnet specimen from Yunling, Zhangzhou Fujiian, China.
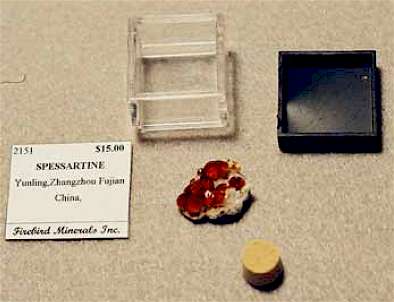
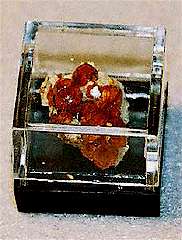
Photograph 1: Parts of the Micromount
In the photograph shown above, we see the micromount box, a cork that has been cut to size to both support the specimen and allow it to fit inside the box, the mineral specimen and the original specimen label. I prefer to mount my specimens in pedestals in the "lid" of the box. There are some who prefer to temporarily mount the specimen using tacky putty. There are no absolutes here so what ever technique works for you is the best one. Because I use my gimbal mechanical stage when examining specimens, having the specimen permanently mounted on a pedestal allows positioning from horizontal to vertical in the stage without having the specimen fall off of the mount. For most of my micromounts I use small corks in sizes 0, 00, 000 and 0000 as the pedestals. I use a hobby razor saw to cut the cork to the proper length. The specimen is temporarily placed on top of the prepared pedestal and a micromount box is test fitted over this assembly to ensure that the box will not hit the top of the specimen. The specimen is then removed and, as shown in Figure 2 below, glued into place in the lid of the box. I use a solvent based adhesive called: Super Glue Corporation Model/Hobby Cement made by Pacer Technology. This adhesive does contain the solvent methyl ethyl ketone (MEK) so it must be used in a well ventilated area. (MEK is considered to be a hazardous substance - editor.)
CAUTION: Use only a small dab of adhesive, using too much will leave an unsightly blob of dried adhesive at the base of the pedestal.
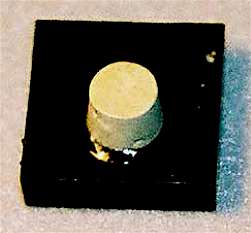
Photograph 2: Gluing the Pedestal in Place
Using a pair of forceps place the pedestal in place in the lid and move the pedestal in a very small circular motion; this helps the adhesive bond to the plastic of the lid. The next step is to paint the outside surface of the pedestal flat black so it blends in with the black of the lid as shown in Photograph 3 below. This ensures that the pedestal will not distract from the specimen when it is viewed under the microscope. Use care to not get paint on the top gluing surface of the pedestal. I use Model Master Flat Back enamel paint for this purpose. Testors #1156 Brush Cleaner works well to wash out the brush after painting the pedestal. After the paint has dried overnight you are ready to continue making the mount. The next step is to mount the specimen to the pedestal.
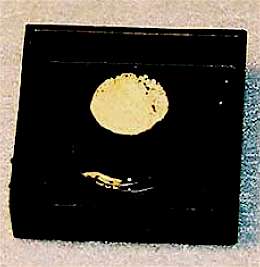
Photograph 3: Painting the Pedestal Flat Black
I use a Q-tip® with the cotton part cut-off and a flat spot carved on the end as a "glue stick". I squeeze a bit of the adhesive out on the glue stick and place it on the top gluing surface of the pedestal. This is a trial and error procedure.
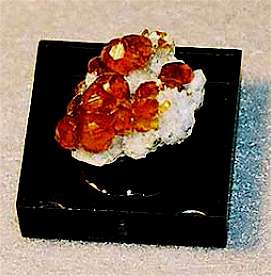
Photograph 4: Mounting the specimen
If you use too much adhesive it oozes out and dries to an ugly mass that detracts from the beauty of the specimen. If you use too little adhesive, the specimen can detach from the pedestal. Next you carefully position the specimen on top of the pedestal, as shown in Photograph 4 above. Allow the adhesive to fully cure, about six hours. Then, under the microscope, I use a very small brush and the flat black enamel paint to cover any exposed pedestal or dried adhesive. When the transparent portion of the box is fitted to the lid which is now the base, you have a very attractive micromount as shown in Photograph 5 below.
Photograph 5: The Completed Micromount
All that remains is to attach the labels. Make sure to label each micromount as they are completed. Now the completed mount is ready to enter into the catalog and the collection. As a side note, you can preserve your labels by coating them with a thin layer of Mod Podge. This is a decoupage medium that you can buy at any craft store. Once dried the Mod Podge forms a water proof plastic shield over the labels keeping them clean and preventing the label adhesive from de-gassing and drying out. This causes the label to come off the box. As mentioned earlier in this column, I use a gimbal mechanical stage of my own design which allows me to position a specimen at any angle and have it held there for an extended period of time. I have my microscope fitted to a X/Y positioning device. (A surplus X/Y drill press vise) which moves the microscope in linear X and Y directions. The gimbal stage allows me to move the specimen in azimuth and rotational X and Y. Photograph 6 below, shows the specimen fitted in the Gimbal stage.
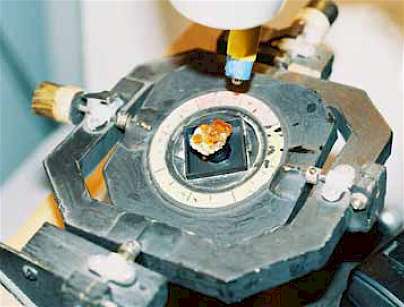
Photograph 6: Specimen in the Gimbal Stage
To date my micromount collection numbers over 2000 specimens most mounted in "Babulski Style" mounts. I would like to hear about how you mount your specimens.

Copyright © Georgia Mineral Society, Inc.